Sunday 23 December 2018

24V wiring on the narrowboat

Well, it's been quite a busy month, with the majority of my focus on the heavyweight 24V electrics.

At the time of the last post, I'd completed some of the wiring, but was halted as I didn't have a crimper big enough to handle the 70mm2 cables that had to run from the domestic battery bank to the inverter. At full power, the inverter will be pulling 200A from the batteries, so the cables and connections need to be rated appropriately.

Once I had the crimper, it was on to the heavy cabling in earnest. A friend of mine made a couple of bespoke brackets to hold the big 400A isolator switches. These need to be mounted as close as possible to the batteries. Power is then fed through a megafuse to the busbar and is distributed from that point.

It's surprising just how many connections needed to be made to the busbars! I was careful to make the installation as neat as possible, to facilitate tracing and fault-finding if required. Any loose cables were routed in convoluted pipe to prevent chafing.

24V busbars
At the final stages of the shell build, I'd made a mistake when locating the starter battery box. I asked them to place it near the starter motor... as I realised later, it needed to be near the bulkhead with a all the other electrics. So it was out with the angle grinder and a crowbar; before long, I had it loose and was able to relocate it.

Starter battery islolation switch
Next job was to wire up the starter motor. This was an awkward job, as the only safe place to route the cables was along the engine bearer, which was fine, but getting the screws into the cable clamps involved trying use a drill under the engine, whilst holding the cable and the clip - and not really being able to see!


The temperature sensors for the inverter and A2B charger were connected to battery negative and an additional fused supply was taken off to provide unswitched power for the bilge pumps.

The Victron Colour Control unit was connected to the inverter and MPPT controller using the VE Bus and VE Direct cables. It's an impressive piece of kit that tells you what's going on around the system.


That completed the 'power' side of the 24V electrics. The next phase will involve taking cables from the distribution box out to the various lights, pumps and other 24V equipment. The installation just needs labels applying to the key components.

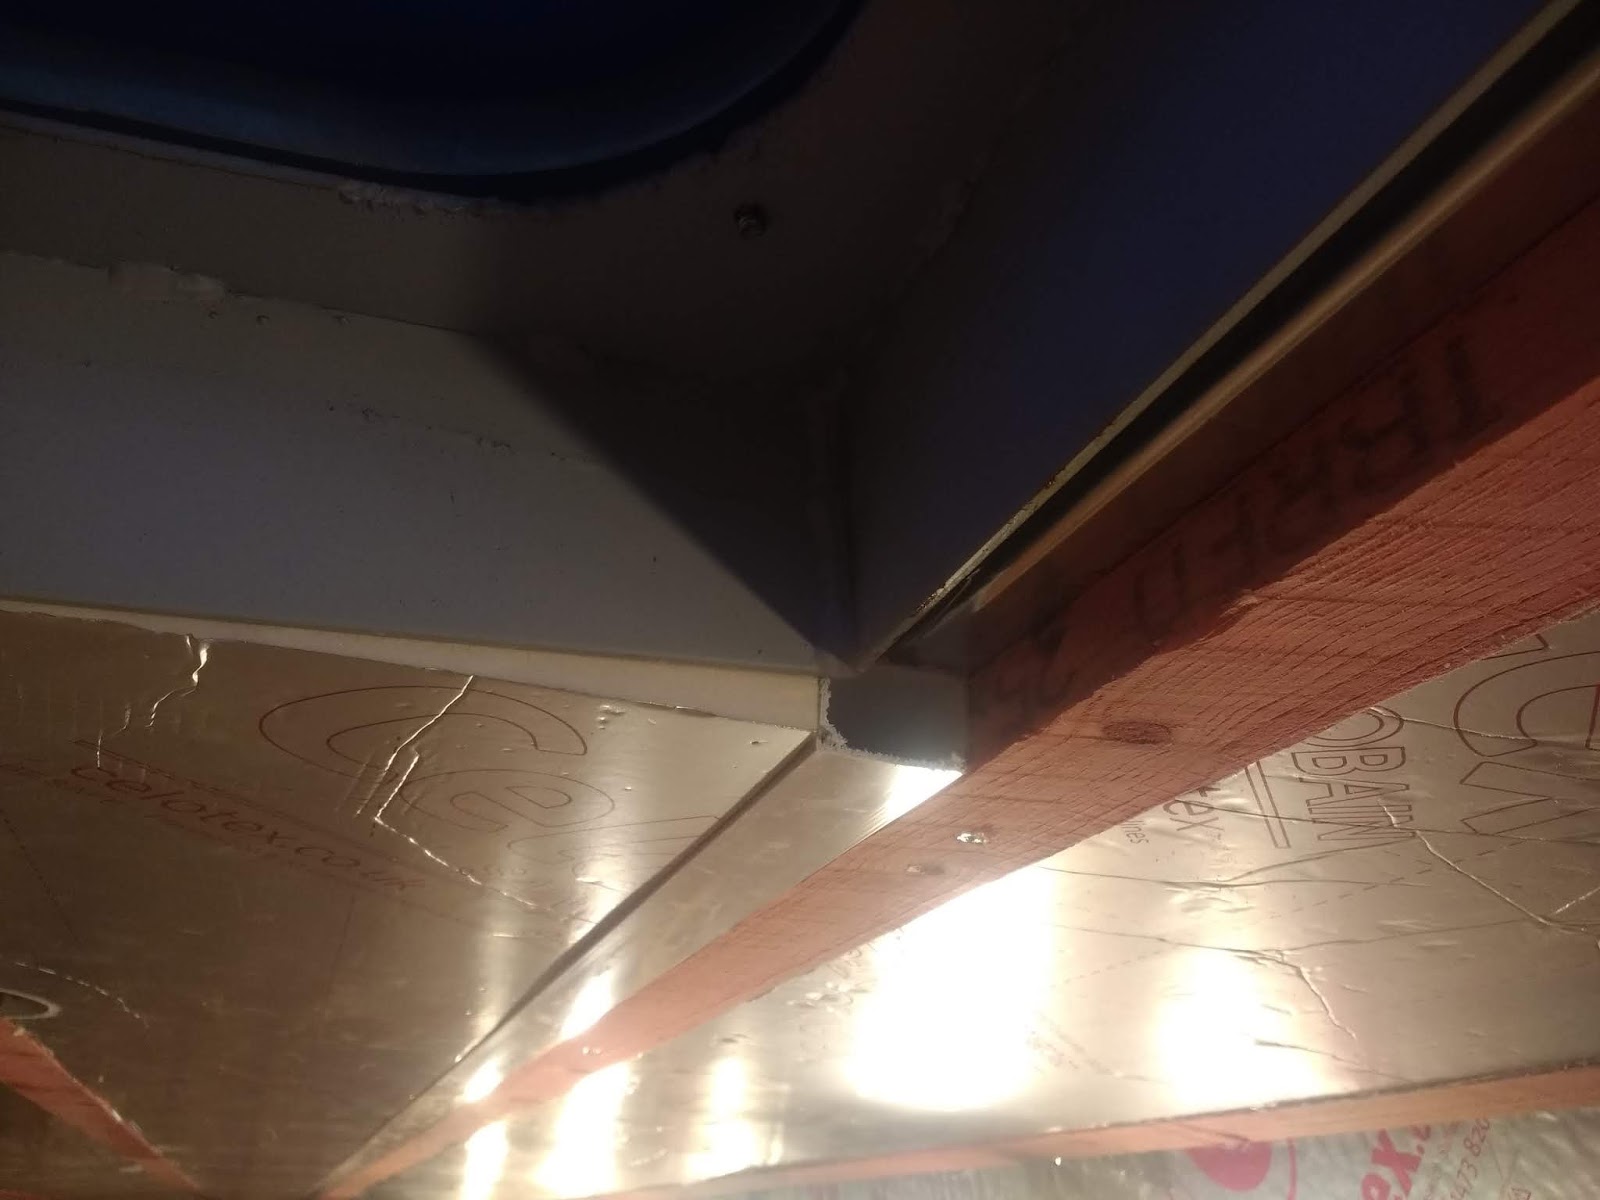
Best practice is to keep 230V AC cables separate from the low voltage DC ones. So the AC is fed through trunking below the gunwale and the DC stuff through trunking in the roof. This is one way the Celotex insulation has worked out very well. The roof has two layers of 12mm, which made a level with the steel roof bearers. I then fixed 25mm battens lengthwise and ran two 25mm x 40mm plastic trunkings right down the boat. The spaces in between were filled with a final layer of 25mm Celotex, giving a total of 49mm under the roof.

Showing trunking in roofspace

By routing a channel, it should be a relatively easy matter to break out of the trunking to supply lights and other equipment.

With the ceiling insulation finshed (hooray!) between the engine room bulkhead and the forward bulkhead, I could now turn my attention to getting that battened and insulated, as it was one of the last remaining areas of bare steel.


Tuesday 11 December 2018

Engine room bulkhead and electrics

As I mentioned in the last post, a key objective was to get a 'decent' source of mains power. The marina only has a 6A supply, which kicks out as soon as you pick up something like a nail gun.

As I have twelve 2V 840Ah batteries on board, the obvious approach was to trickle charge them, overnight and when I'm not there, to have oodles of power when I need it.

So the priority was to construct the engine room bulkhead - a frame of 2" square ash and boarded with 14mm T&G. I had pre-made the ash components in the workshop, so it was a relatively simple matter to assemble the components and fix in place.


Next, on with the T&G boarding...

This is taken from the engine room side, after the first coat of varnish. Next job was to locate and hang the various major electrical components: inverter, consumer unit, solar controller, Victron colour display, Sterling A2B charger, etc.


An electrician friend came down for a few hours and installed an RCD in the Potter's locker (to protect the incoming shoreline), wired up the consumer unit and put in a couple of double sockets, one at each end of the boat. I feel happier now that all the AC is properly protected.
I had an issue with the big battery bank failing to deliver any useful current. It turned out to be one slightly dodgy connection on a battery interlink, now resolved.


With the basic 230V stuff sorted, it was time to turn my attention to the 24V DC cabling. At this point, it's worth explaining that the back of the engine room bulkhead forms the inside of what will be the airing cupboard. This gives a great opportunity to hide a lot of the wiring.


The 155Amp 28V alternator has been removed and wired up...


... and re-installed. This was followed by the busbars, megafuse and 24V distribution panel. This needed a little box making, due to the depth of the fuses and wiring.


With the inverter connected and the battery bank fully charged, it was time for the acid test - a full burn cycle of the Cinderella toilet, purely under inverter power. (This featured in an earlier blog, but in essence, the whole electrical system has been designed to allow repeated use of the toilet, without recourse to the generator or starting the engine.) So I unplugged the shore power and started the toilet operating.


After 50 minutes, the toilet stopped incinerating and went into the cooling phase. Success! The only evidence of its operation was the quiet fan noise and the inverter running its cooling fans during peak load. I'm delighted that the system has passed this aggressive test with flying colours!

It will now be a simple matter to install the toilet: a 13A plug and some plastic 4" pipe out through the roof vent.

I will admit to looking slightly smugly at other boaters, when they are struggling with their poo-laden cassettes, on their way to the Elsan point. I am also very pleased that I won't have to find room for a massive sewage storage tank. I have every confidence now, that this toilet system will be the gold standard of the future.

The Cinderella toilet is available from https://www.leesan.com/shop/all-toilets/incineration-toilets


I now have the hydraulic crimper for the big 70mm cables and connectors, so that's the next job...

Maiden voyage and cooker!

It's been an eventful few days! We've been enjoying a spell of unseasonably warm weather, which was predicted to end on the last day...